Painting a Weatherboard Home
A Complete Guide from Prep to Perfect Finish
The classic weatherboard home is an iconic part of the Australian landscape, from charming suburban cottages to modern coastal retreats. A fresh coat of paint does more than just boost its street appeal; it’s the home's primary line of defence against the harsh Aussie elements. Painting weatherboards is a significant undertaking, but a methodical approach and meticulous preparation will reward you with a stunning, long-lasting finish that protects your investment for years to come.
Phase 1: The Critical Preparation Stage
This is by far the most labour-intensive part of the job, but it's where the quality of the final finish is determined. Do not rush this.

- Thorough Cleaning: Over the years, weatherboards accumulate a heavy layer of dirt, dust, pollution, and mould. The most effective way to clean them is with a pressure washer. Use a wide fan setting and keep the nozzle moving to avoid damaging the timber. For stubborn mould, you may need to pre-treat with a specialised mould killer.
- Scrape and Sand: Once the boards are completely dry, inspect every inch of the house. Use a sharp paint scraper and a wire brush to remove any and all loose, cracked, or peeling paint. Feather the edges of the scraped areas with 80-grit sandpaper to create a smooth transition to the sound paint.
- Repair and Fill: Check for any soft or rotten timber, which will need to be replaced by a professional. For smaller imperfections, fill any cracks, gaps, or nail holes with a flexible exterior-grade filler and a putty knife. Once dry, sand the filler smooth.
- Gap the Boards: Use a quality exterior gap sealant to fill the horizontal gaps between the weatherboards and any vertical gaps at the corners. This is a vital step to stop water from getting in behind the boards.
Phase 2: Priming – The Essential Undercoat
After all that prep, you'll have a patchwork of bare timber, old paint, and filler. Priming unifies the surface and ensures your topcoats adhere properly and last as long as possible.
- Spot Prime Bare Timber: Any areas that you have scraped back to bare wood must be primed. Use a quality oil-based or acrylic timber primer. This seals the wood and prevents tannins from bleeding through and staining your new paint.
- Prime the Fillers: Also apply a spot prime over all your filled patches to ensure they don't show through the topcoat.
- Consider a Full Prime: If the old paint is heavily weathered or you are making a significant colour change, priming the entire house is the best course of action for a uniform and durable finish.
Phase 3: Applying the Topcoats
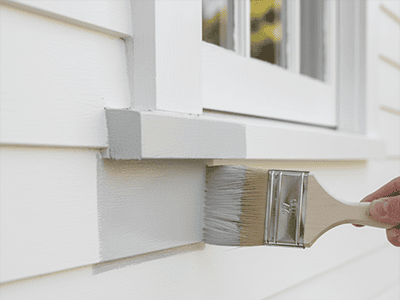
With the hard work done, it's time to apply your chosen colour. Always use a premium 100% acrylic exterior paint, such as Dulux Weathershield, which is designed to flex with the timber.
- Work in the Shade: Never paint in direct, hot sunlight. The paint will dry too quickly, leaving brush marks and reducing its ability to bond properly with the surface. Follow the shade around the house as the day progresses.
- Top to Bottom: Always work from the top of the house down. Start with the eaves, then the fascias and gutters. For the weatherboards, start at the top and work your way down one board at a time.
- Brush or Spray: A paintbrush is the traditional tool, but for large areas, an airless sprayer will provide a faster, more uniform finish (though this is best left to the pros). If you do use a brush, use long, even strokes, and always maintain a wet edge to avoid lap marks.
- Apply Two Full Coats: For maximum durability and colour richness, two full topcoats are essential. Allow the first coat to dry completely according to the manufacturer's instructions before applying the second.
Pro Tip from a Sydney Painter
The success of a weatherboard paint job lies entirely in the quality of the preparation. Identifying and correctly treating all areas of paint failure is a skill that comes with experience. At DRJ Painting, our meticulous preparation process, combined with professional spray application techniques, ensures a flawless, "like-new" finish that provides the ultimate protection against Sydney's coastal climate. It's an investment that pays for itself in longevity and street appeal.