How to Repair Cracks and Holes in Plasterboard
A Simple Guide to Making Wall Imperfections Vanish
Look closely at any wall in your home, and you’ll likely find a few battle scars: old picture hook holes, dents from moving furniture, or fine hairline cracks that appear over time. It’s tempting to think a thick coat of paint will hide them, but it’s a myth. Paint is a thin liquid film; it will actually highlight these imperfections, not conceal them. The good news is that fixing gyprock is one of the most satisfying DIY jobs you can do, and getting it right is the key to a truly flat, professional-looking wall.
First, Gather Your Repair Kit
You don't need many tools for this job, but having the right ones makes all the difference. You can find everything you need at your local hardware store.
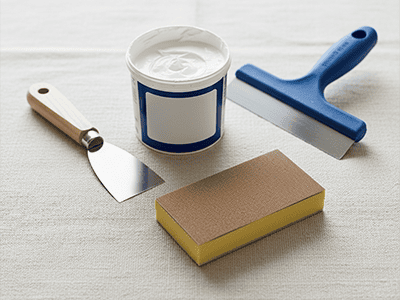
- Multi-Purpose Filler: A pre-mixed tub is easiest for small jobs. For larger repairs, you might consider a powdered filler you mix yourself.
- Putty Knives: Get two – a smaller, flexible one (about 4cm) for applying filler into holes, and a wider, more rigid one (about 10cm) for smoothing larger areas.
- Sanding Block and Sandpaper: A medium-grit (120-180 grit) sandpaper is perfect. A sanding block helps you keep the surface perfectly flat.
- A clean cloth and drop sheet.
The Process for Small Nail and Screw Holes
This is the most common repair job and it's incredibly simple to get right.
- Prepare the Hole: Use the corner of your putty knife to gently press the edges of the hole inwards. This creates a small indent, allowing the filler to sit flush when finished. Wipe away any dust.
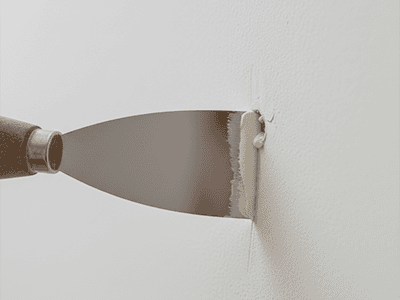
- Apply the Filler: Scoop a small amount of filler onto your wider knife, then take some from that onto your smaller knife. Press the filler firmly into the hole, swiping over it from a couple of different angles to ensure it’s completely filled.
- Scrape it Smooth: The final swipe should leave the filler sitting just slightly proud of the wall surface. Don't try to get it perfectly flat just yet.
- Sand it Flush: Once the filler is completely dry (check the instructions on the tub), use your sanding block to gently sand the patch. Use circular motions until it feels perfectly smooth and level with the rest of the wall.
Tackling Hairline Cracks
For fine cracks, you need to give the filler something to grip onto. Simply smearing filler over the top won't work, as the crack will reappear.
- Open the Crack: Use a utility knife or the sharp corner of your putty knife to carefully run along the crack, opening it up into a narrow 'V' shape. This seems counter-intuitive, but it creates a channel for the filler to lock into.
- Fill and Sand: Fill the newly created channel using the same method as for small holes, pushing the filler firmly into the V-groove. Once dry, sand it back until it's perfectly smooth.
Pro Tip from a Sydney Painter
The final, non-negotiable step is spot priming. Filler is more porous than a painted wall and will absorb paint differently, leaving a dull, visible patch no matter how many topcoats you apply. Once your repair is sanded and wiped clean, apply a single coat of primer just over the patched area. This seals the repair, making it truly invisible once the final coats of paint go on. It's this attention to detail that separates a DIY job from a professional one, and it's a standard step in every project we undertake at DRJ Painting.