How to Cut In Like a Pro
A Step-by-Step Guide to Achieving Razor-Sharp Edges
Rolling the large sections of a wall is the easy part of painting. The true test of a painter's skill lies in the "cutting in" – the process of creating a clean, sharp line where the wall meets the ceiling, skirting boards, architraves, or another wall. It’s what separates a messy, amateur job from a stunning, professional finish. Getting it right is incredibly satisfying, especially when you peel back the painter's tape to reveal a perfect edge. With the right tools and a little patience, you can master this essential technique.
The Secret is the Brush (and a Steady Hand)
You can’t expect professional results with a cheap, nasty brush. Investing in a single, high-quality brush is the most important step. It will hold more paint, release it more smoothly, and give you far greater control than any budget alternative.
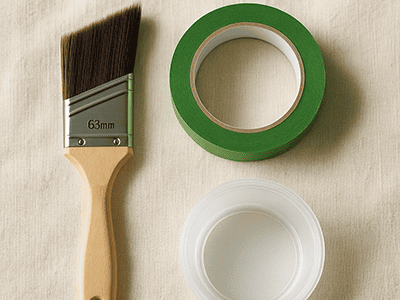
- A Quality Angled Brush: This is your hero tool. A 50mm or 63mm angled sash cutter brush is perfect. The angled bristles are designed to release paint precisely, making it easier to control the line.
- A Small Paint Pot: Don’t try to cut in directly from a 4-litre can. Pour a manageable amount of paint into a small paint pot or a clean takeaway container. It’s lighter to hold and reduces the risk of spills.
- Good Quality Painter's Tape: For areas like skirting boards, good tape is your best friend. Choose a reputable brand from Bunnings or your local paint shop that won't bleed or pull fresh paint off.
- A Damp Rag: Keep a clean, damp rag tucked into your pocket at all times. This is for instantly wiping away any wobbles or mistakes before they have a chance to dry.
The Technique: A Step-by-Step Guide
Patience is key. Rushing the cutting-in process is a recipe for wobbly lines and frustration. Take your time and focus on one section at a time.
- Load the Brush Correctly: Dip about a third of the brush bristles into your paint pot. Tap it gently against the inside of the pot to remove any excess – don't wipe it on the rim, as this creates a messy build-up. You want a decent amount of paint on the brush, but not so much that it will drip.
- Create a "Buffer Zone": Start by painting a line about 2-3cm away from the edge you want to cut. This unloads some of the excess paint from your brush, giving you more control for the final, precise stroke.
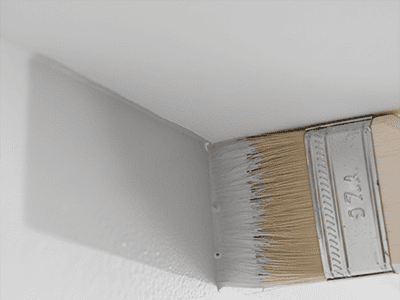
- Make the Cut: Position your brush with the long edge of the bristles parallel to the line you are painting. Using a long, smooth, and continuous stroke, gently press the brush so the bristles fan out slightly and the tip creates a razor-sharp line right in the corner. Pull the brush towards you; don't push it.
- Feather the Edge: Once your sharp line is done, use the brush to lightly "feather" the outer edge of your cut-in band. This creates a slightly thinner edge that will blend seamlessly when you come to roll the main wall, preventing a thick, visible border.
- Maintain a Wet Edge: Try to roll the main part of the wall while your cut-in section is still wet. This helps the two areas merge together flawlessly, avoiding "picture framing" where the cut-in border is a slightly different shade or texture.
Pro Tip from a Sydney Painter
The biggest giveaway of a DIY paint job is wobbly, uneven cut-in lines. It takes years of practice to develop the muscle memory for a perfectly straight line every single time, especially on older Sydney homes with less-than-perfect corners. This is where a professional's experience really shines. At DRJ Painting, our team has the steady hands and expert techniques to deliver those flawless, razor-sharp edges that define a high-quality finish.